
Adding devices
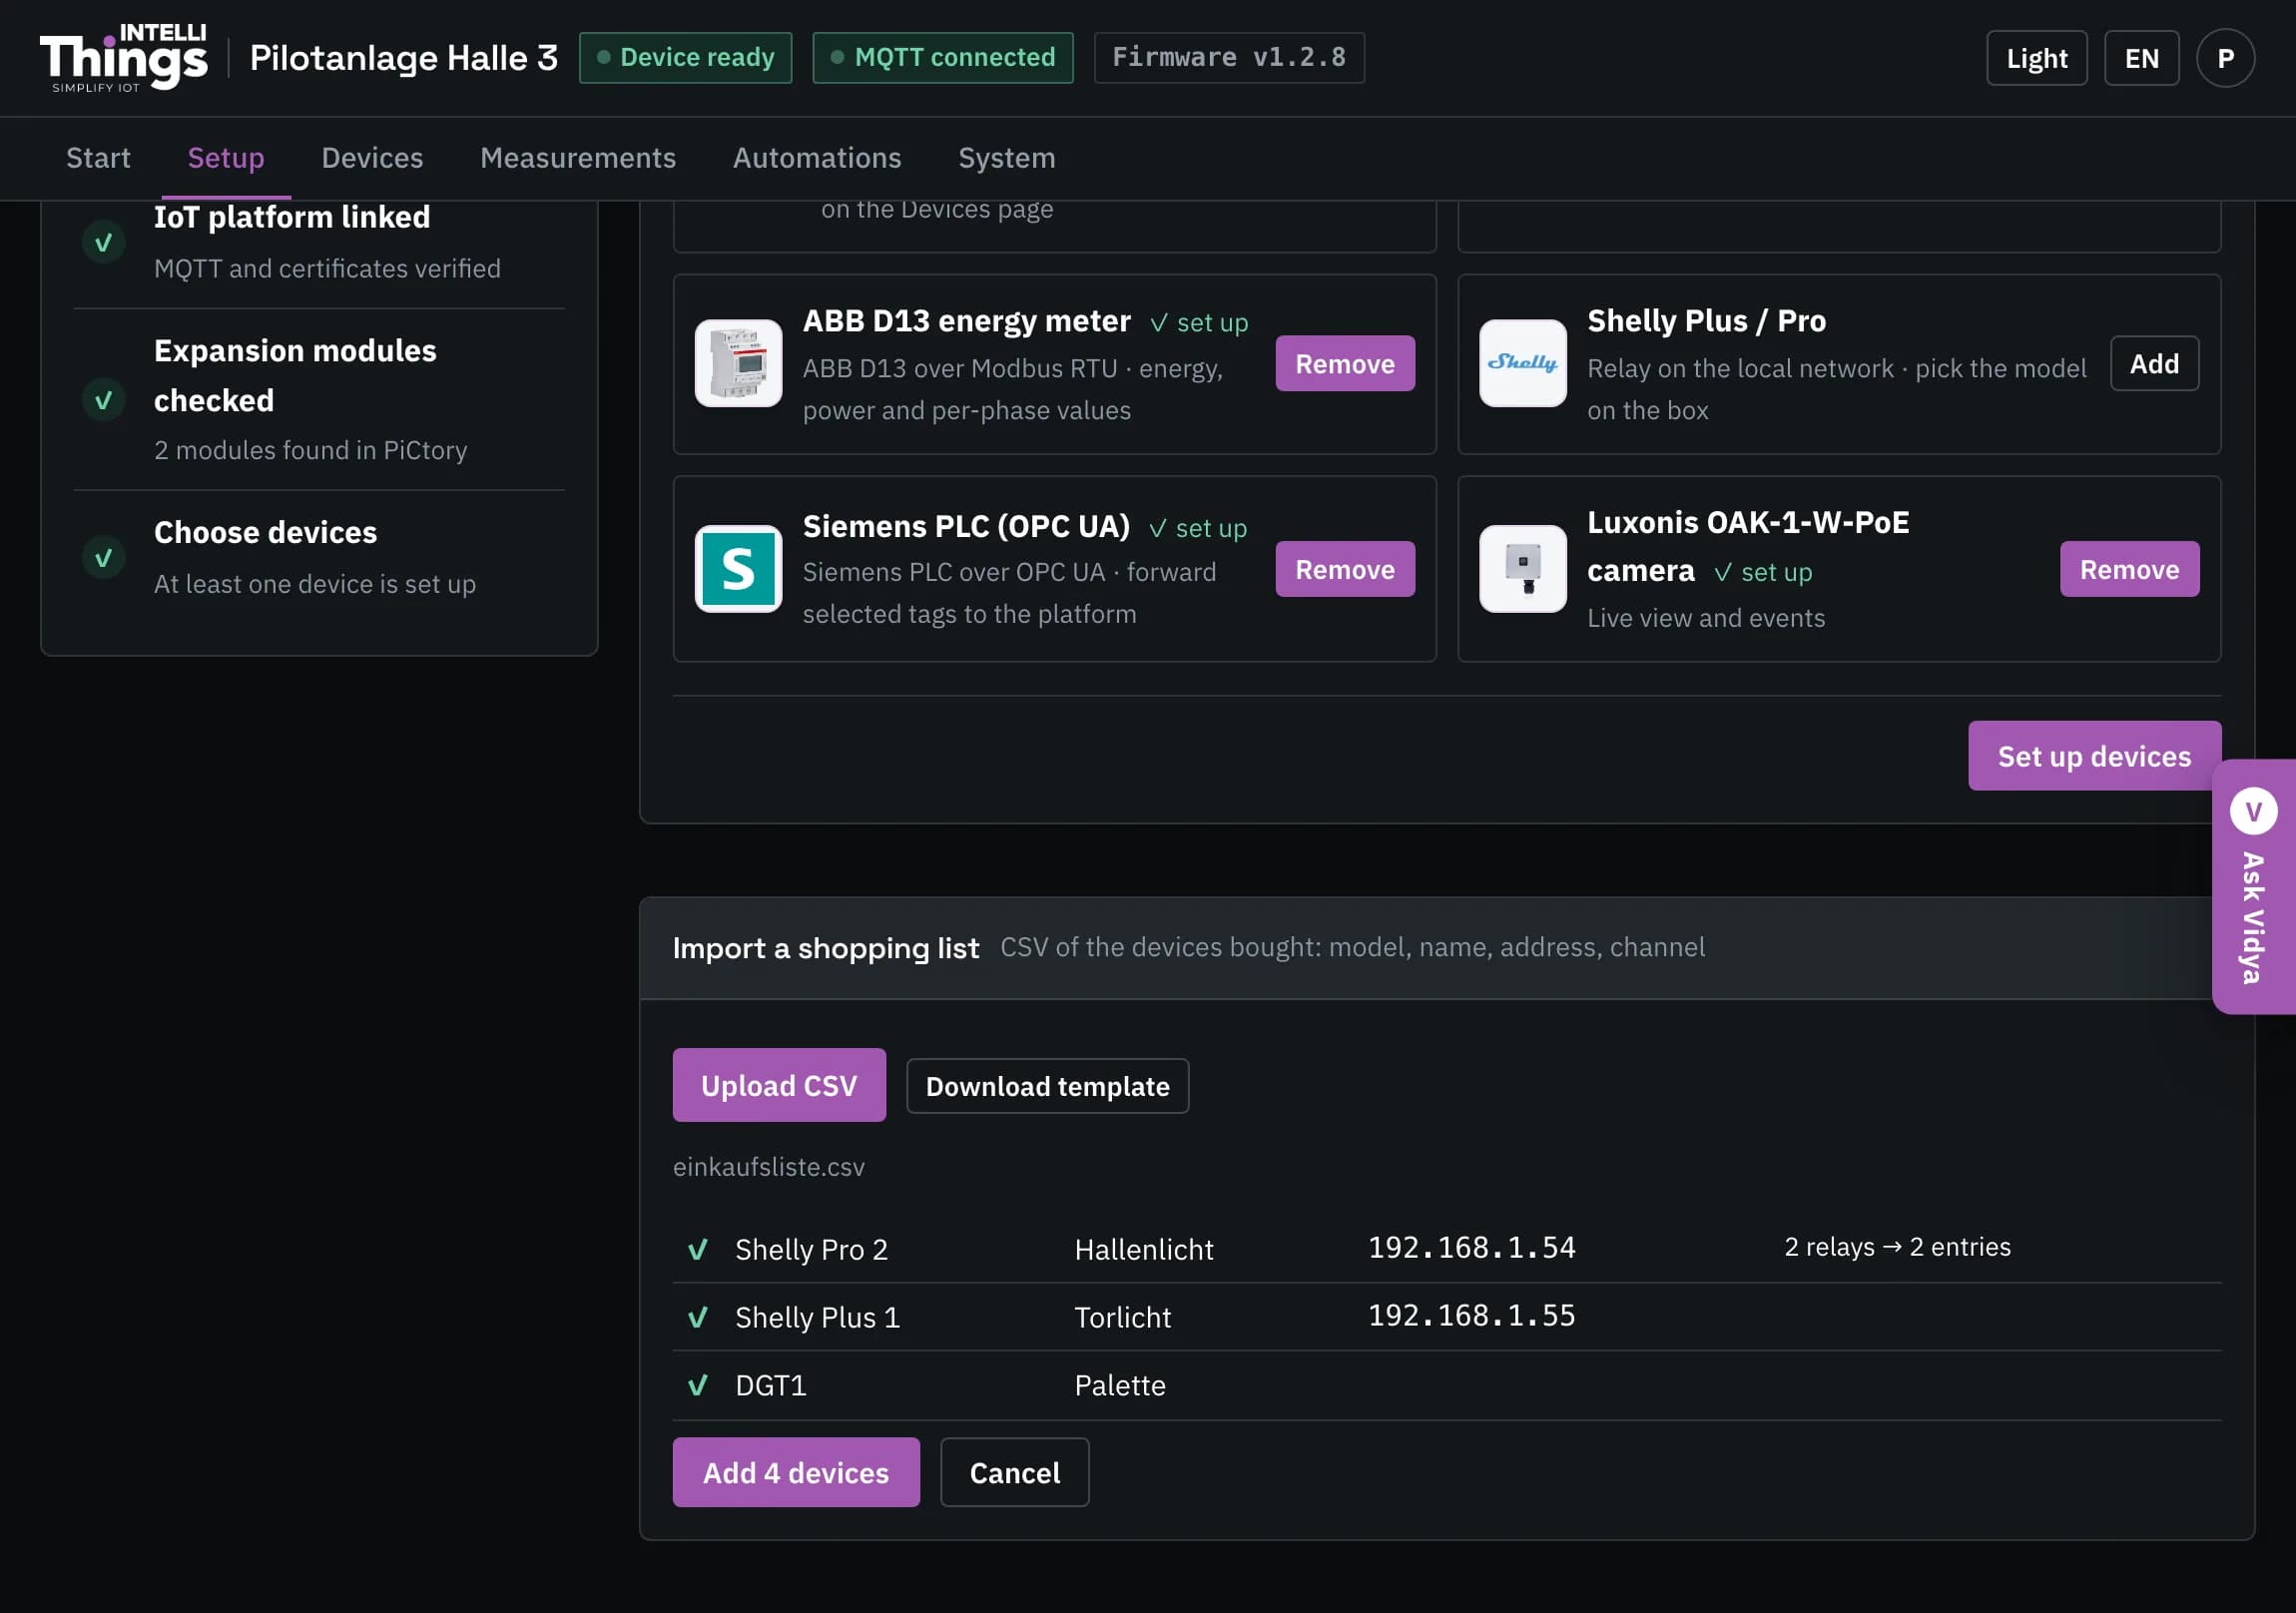
Add connected devices using the setup wizard or import multiple devices from a CSV file.
Use Setup to add the devices connected to your RevPi. Once you have added a device, open its page under Devices to view wiring instructions and adjust its settings. Use Measurements to choose which readings to send to intelliThings CORE. See Sending to the platform.
Setup checklist
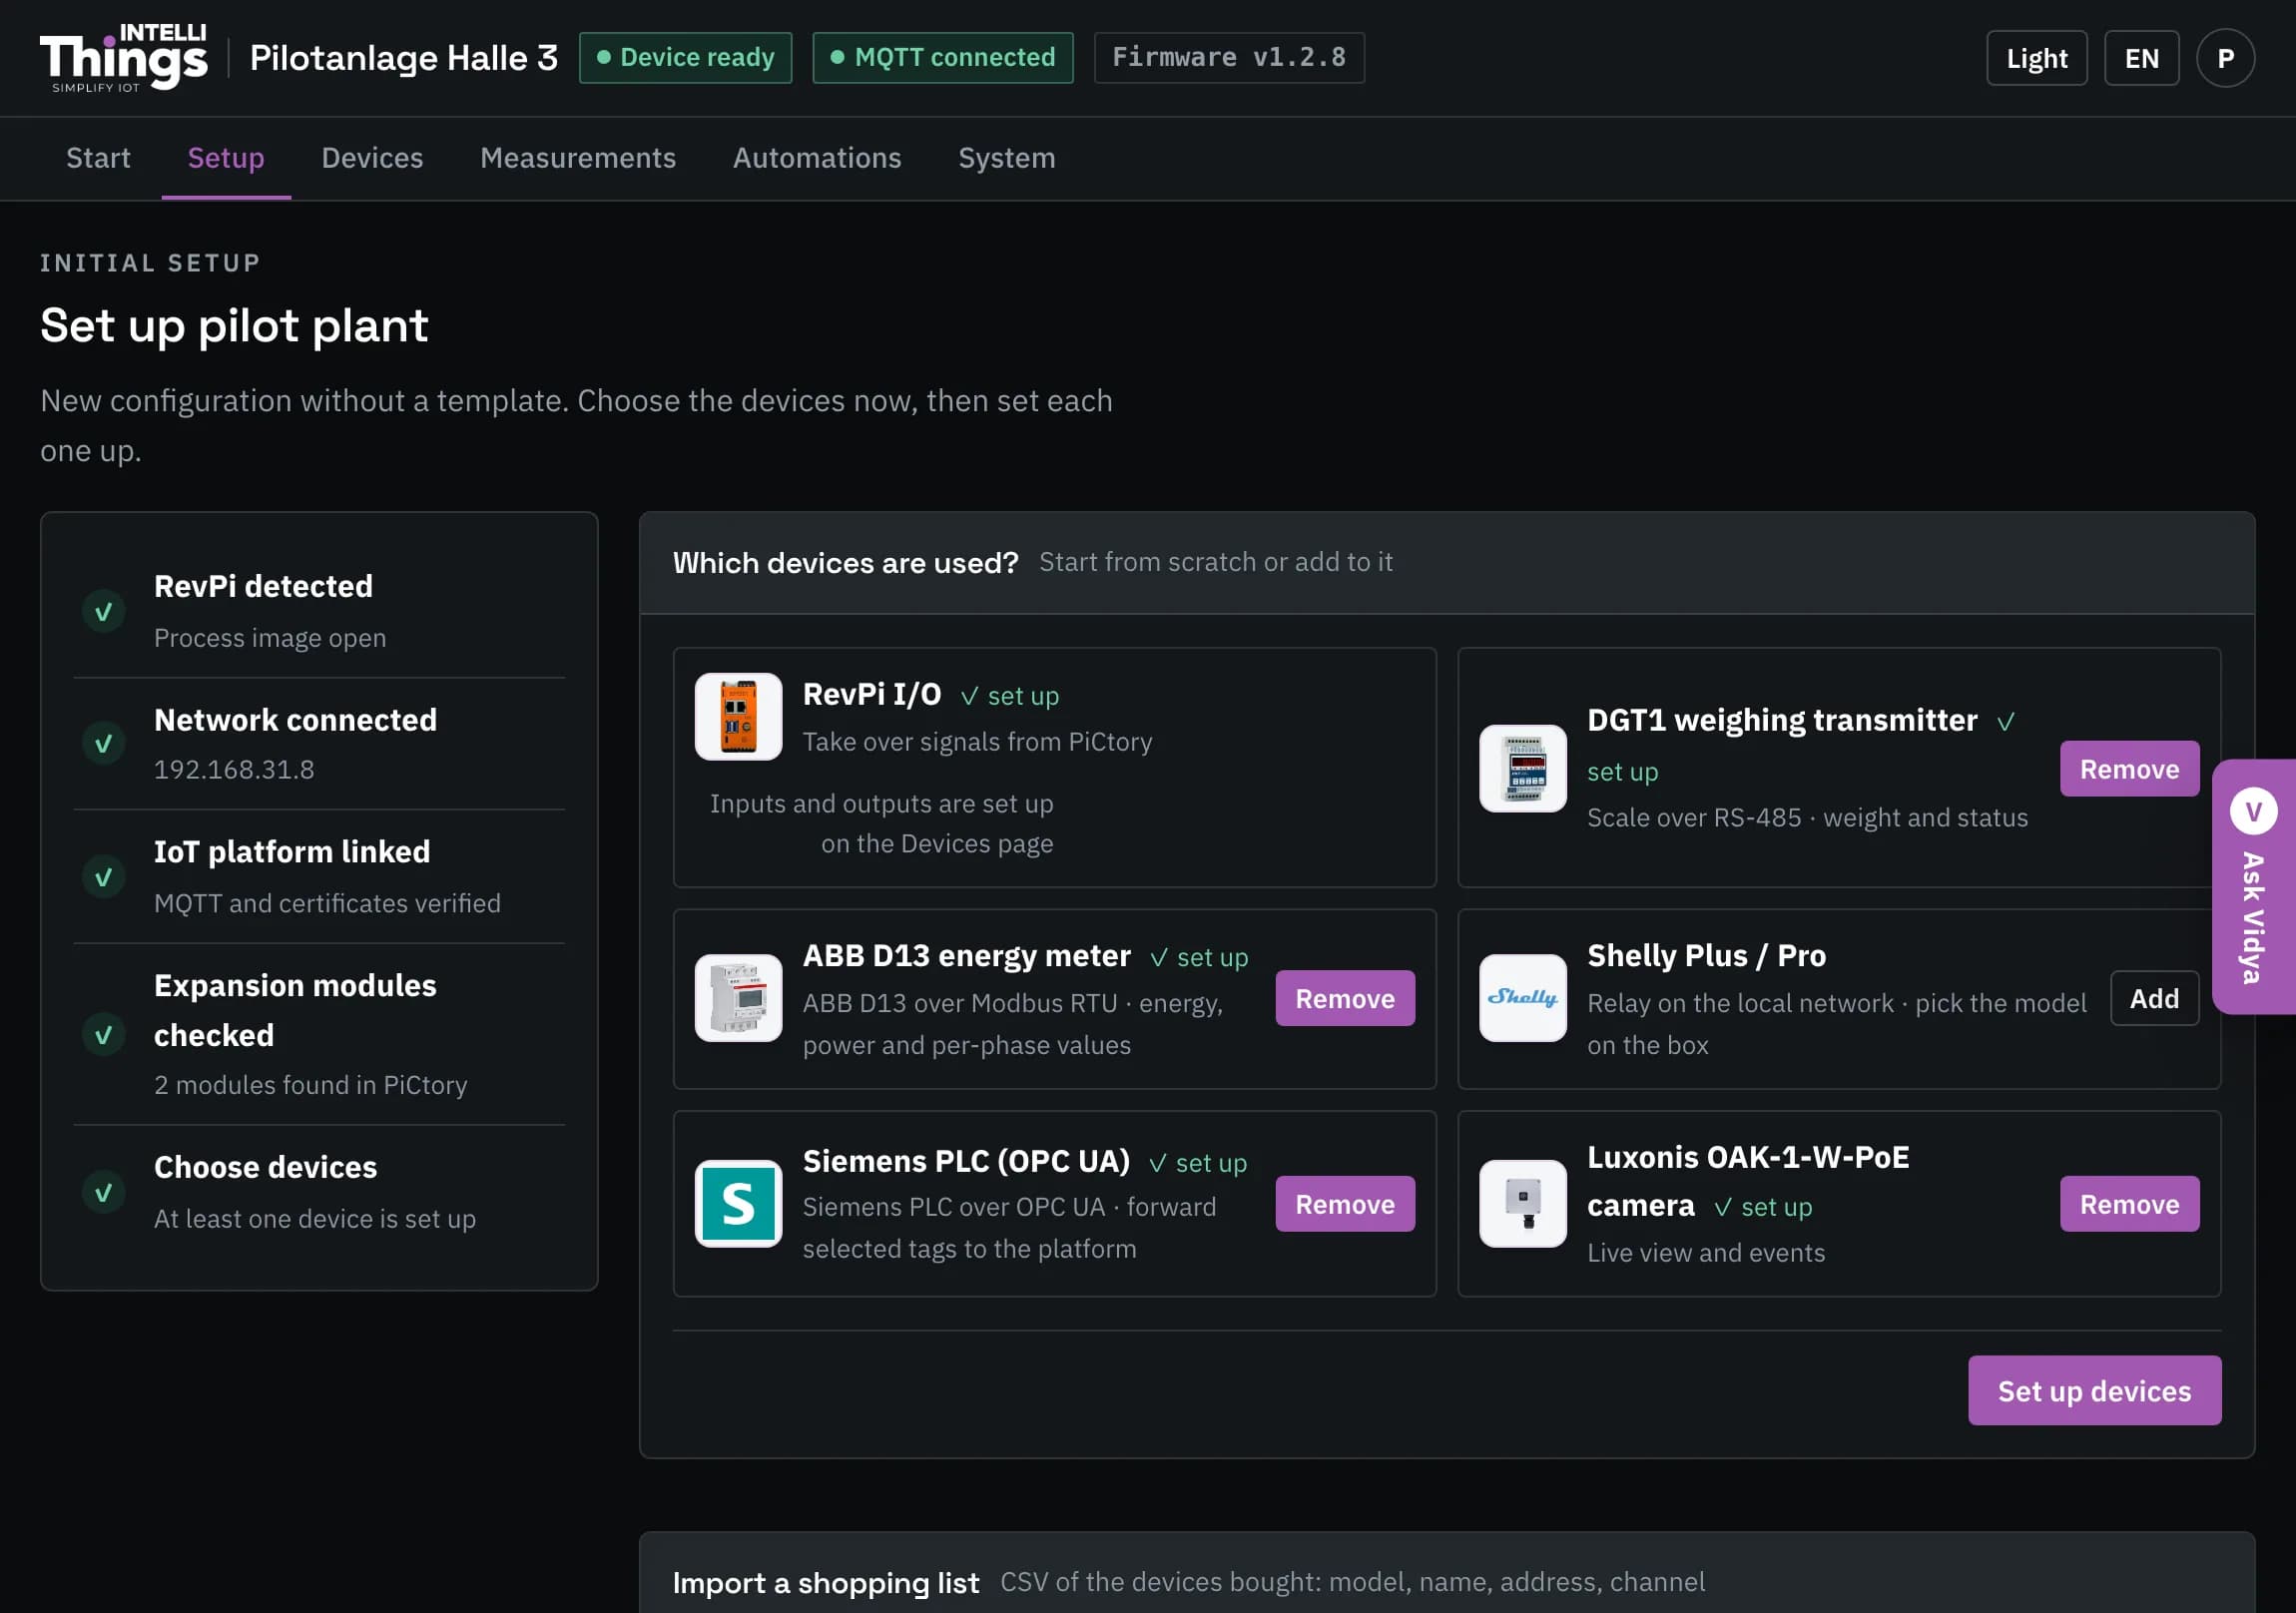
The checklist on the left shows the setup status. Each item turns green automatically when its requirement is met:
- RevPi detected — the RevPi can read its inputs and outputs.
- Network connected — the RevPi has an IP address. The address is displayed here.
- IoT platform linked — the RevPi is connected to intelliThings CORE.
- Expansion modules checked — shows the number of expansion modules fitted to the RevPi. These provide additional inputs and outputs; common module types are AIO, MIO and DIO. No expansion modules are required if your connected equipment does not need them.
- Choose devices — at least one device has been configured.
Device catalogue
The catalogue on the right lists all supported devices. Each entry includes a photo to help you identify the hardware in your cabinet.
Configured devices are marked ✓ Set up, and their button changes to a remove option. When you have finished adding devices, click Set up devices at the bottom right to open Devices.
Add a device with the setup wizard
Click Add to open the setup wizard. It guides you through one question at a time. Use Back and Next to move between steps.
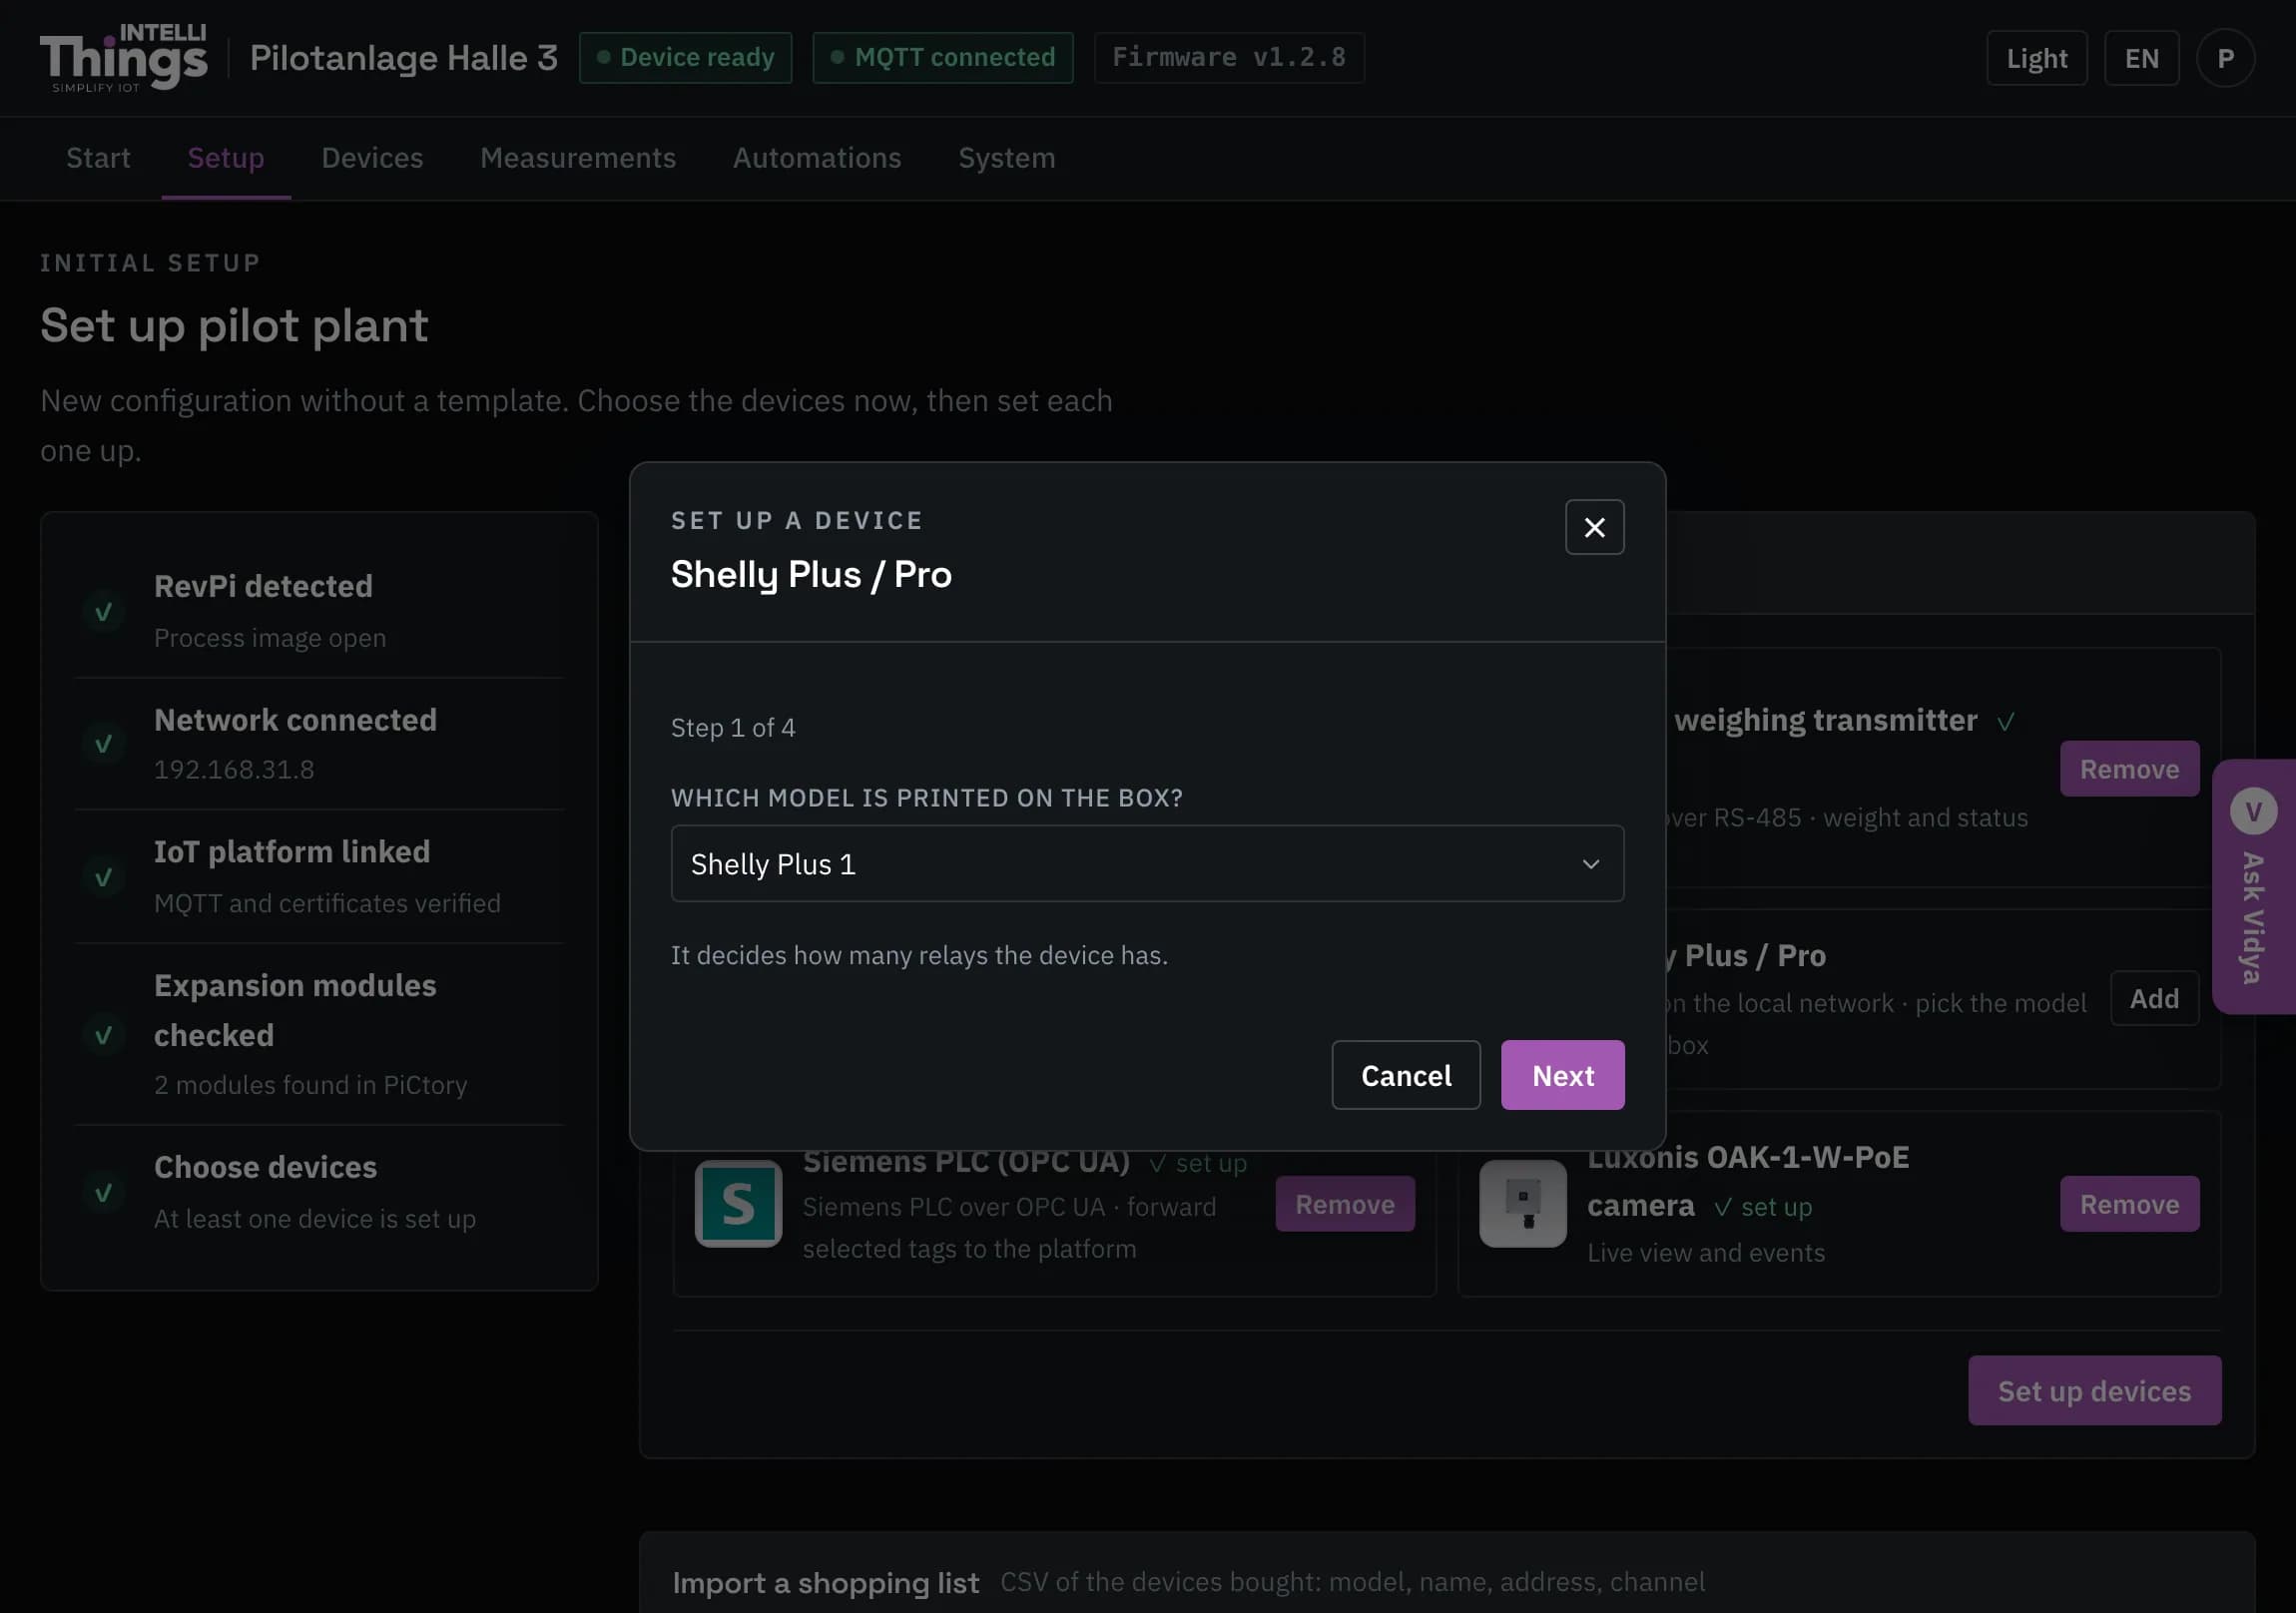
The information requested depends on the device:
| Device | Information requested |
|---|---|
| Shelly Plus / Pro | Model shown on the device’s enclosure, which determines the number of relays; display name, such as “Pump in Hall 3”; IP address; and the relays in use. |
| DGT1 scale | Communication mode (ASCII or Modbus) and baud rate. The serial port is fixed because the RevPi has only one built-in port for this connection. The wiring diagram on the scale’s page shows which terminals to use. |
| ABB D13 meter | Serial port, the meter’s device address and baud rate. |
| Siemens PLC | OPC UA server address, beginning with opc.tcp://, and a username if required by the PLC. |
| OAK camera | Camera IP address. |
For wiring diagrams and communication settings, see Device pages.
- Shelly relay selection: configure all relays of a Shelly in one wizard. Select the relays that are wired and give each one a name. Unselected relays are not added.
- Input validation: the wizard flags invalid entries immediately, with messages such as “Enter an IP address or host name.” or “Must start with opc.tcp://.”
- Serial port assignment: the scale and energy meter cannot share a serial port. If you select a port that is already assigned to the other device, the wizard warns you before you continue. A USB adapter can provide a second serial port.
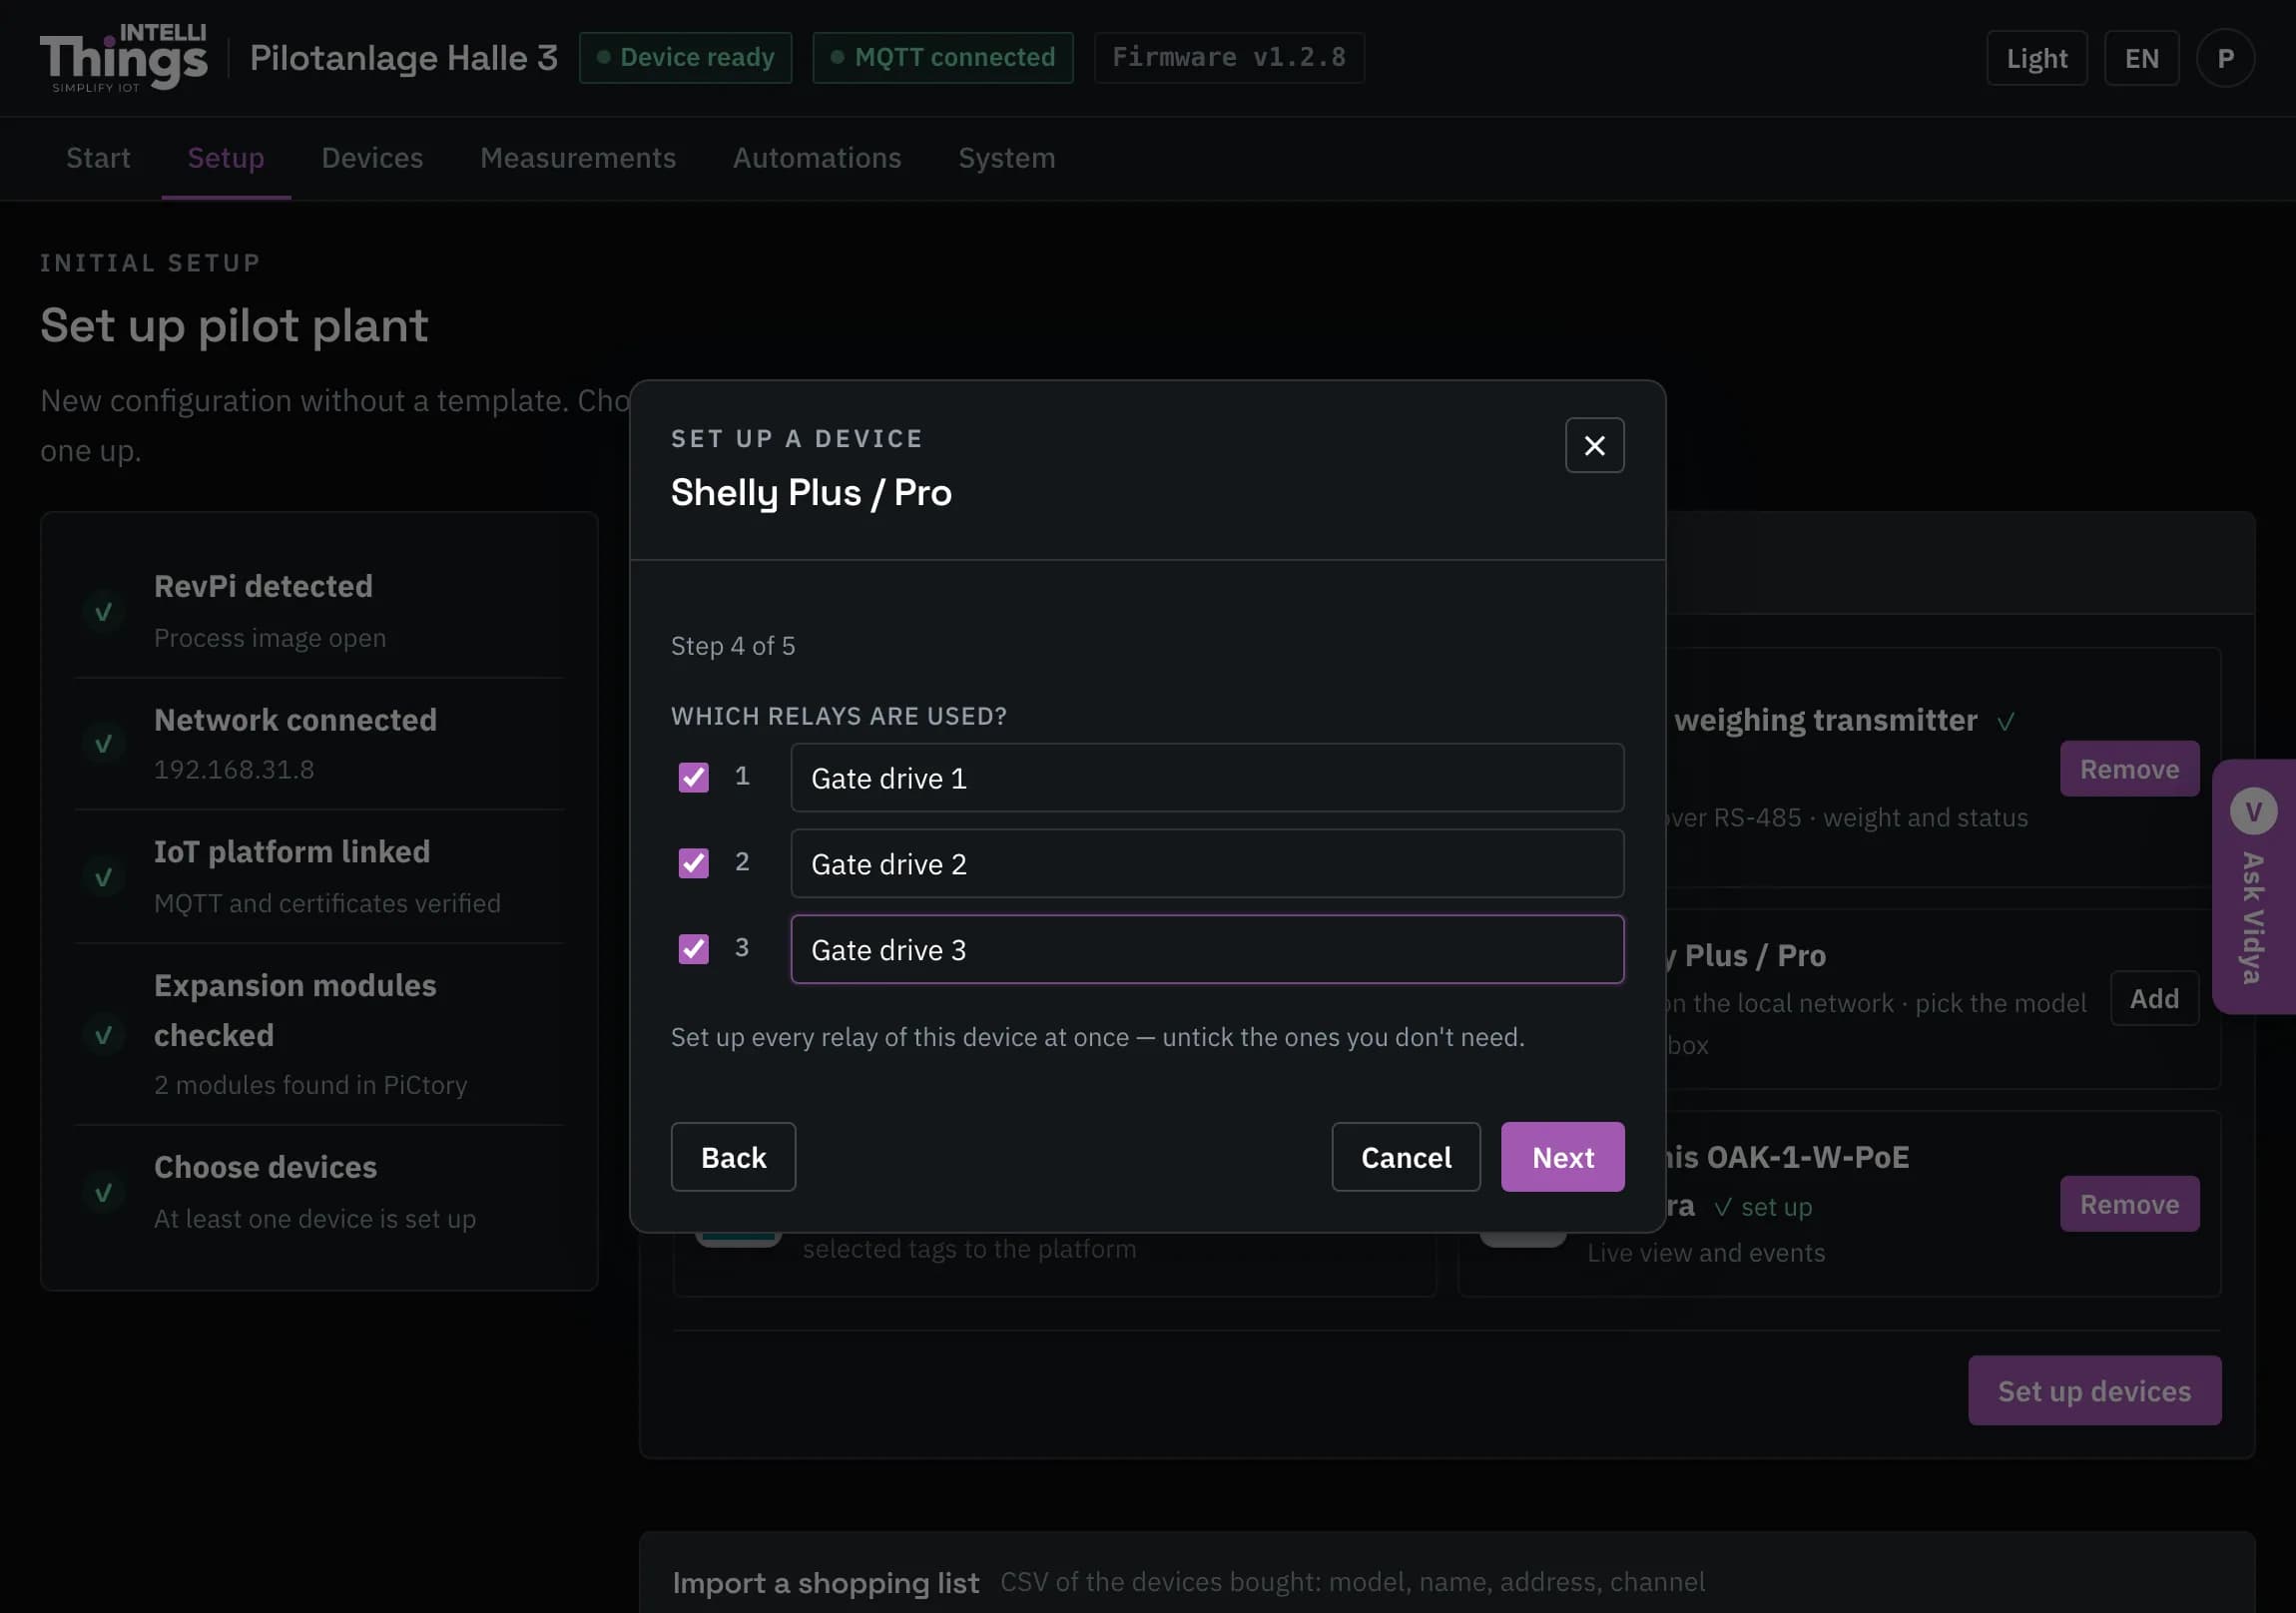
The final screen lists your entries under Please check and states Saved straight away. Review the entries before completing the wizard. Completing it saves the device immediately; no additional page save is required. You can adjust its settings afterwards on its page under Devices.
Add multiple devices from a CSV file
To add several devices at once, prepare a device list in a spreadsheet and save it as a CSV file. Click Download template to get the template:
model;name;address;channel
Shelly Pro 2;Hall lights;192.168.1.54;
Shelly Plus 1;Gate light;192.168.1.55;
DGT1;Pallet;;
ABB D13;Main meter;;| Column | What to enter |
|---|---|
model | Model name exactly as printed on the device’s enclosure. |
name | Display name to use in the dashboard. |
address | Address for a network-connected device. |
channel | Optional channel selection. |
Both commas and semicolons are accepted as separators, including in CSV files exported from Excel.
- Click Upload CSV and select your file.
- Review the preview. Each row shows either ✓ with the devices or relays to be added, or ✗ with the reason the row was skipped. For example, a Shelly Pro 2 with no channel specified adds both relays. In the example above, they are named “Hall lights 1” and “Hall lights 2”.
- Click Add N devices to add the entries as unsaved changes. The yellow bar appears.
- Check the device list, then click Save.
Unlike the setup wizard, the CSV import requires a separate page save. See Saving changes.